
There are many ways to commemorate your Disney World vacation, and Disney Memory Maker may be one of the best ways! It allows you to take professional photos all around the parks, capture moments with your favorite characters, and easily share your memories with friends and family when you get home.
The Disney Memory Maker and PhotoPass can save you time, and maybe even some money! It can also help you take home memories of your favorite moments from Disney World, which means you will have these memories with you forever! And who doesn’t love documented memories?
But how does Disney Memory Maker work? How do you use it? And is it worth the money? We have all those answers and more right here! This article will make sure to really dig into if the Disney Memory Maker and PhotoPass is worth it or not!
So don’t worry: we plan on giving you all the details and our best tips to make sure you know whether Memory Maker is right for you and your family. And we will make sure to give you a break down on all you need to know in order to get the most out of Disney Memory Maker for your next trip!
How Does Disney Memory Maker Work?
Table of Contents
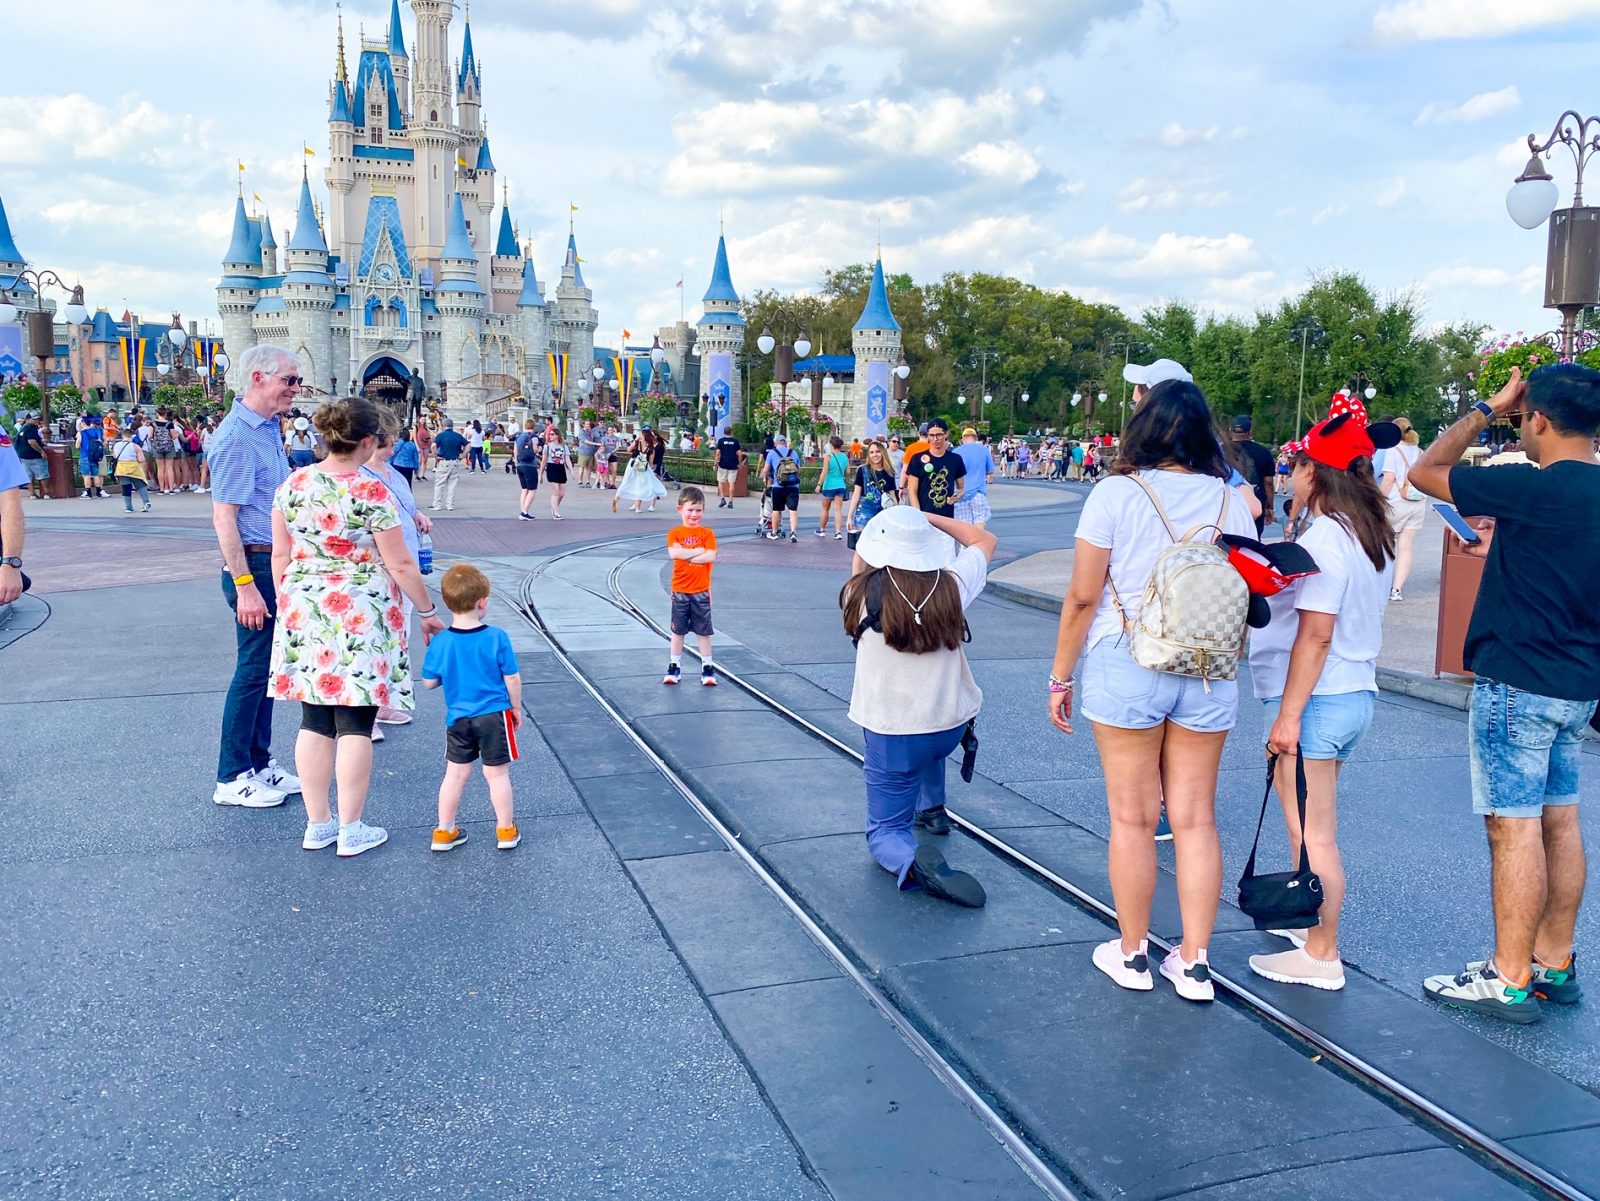
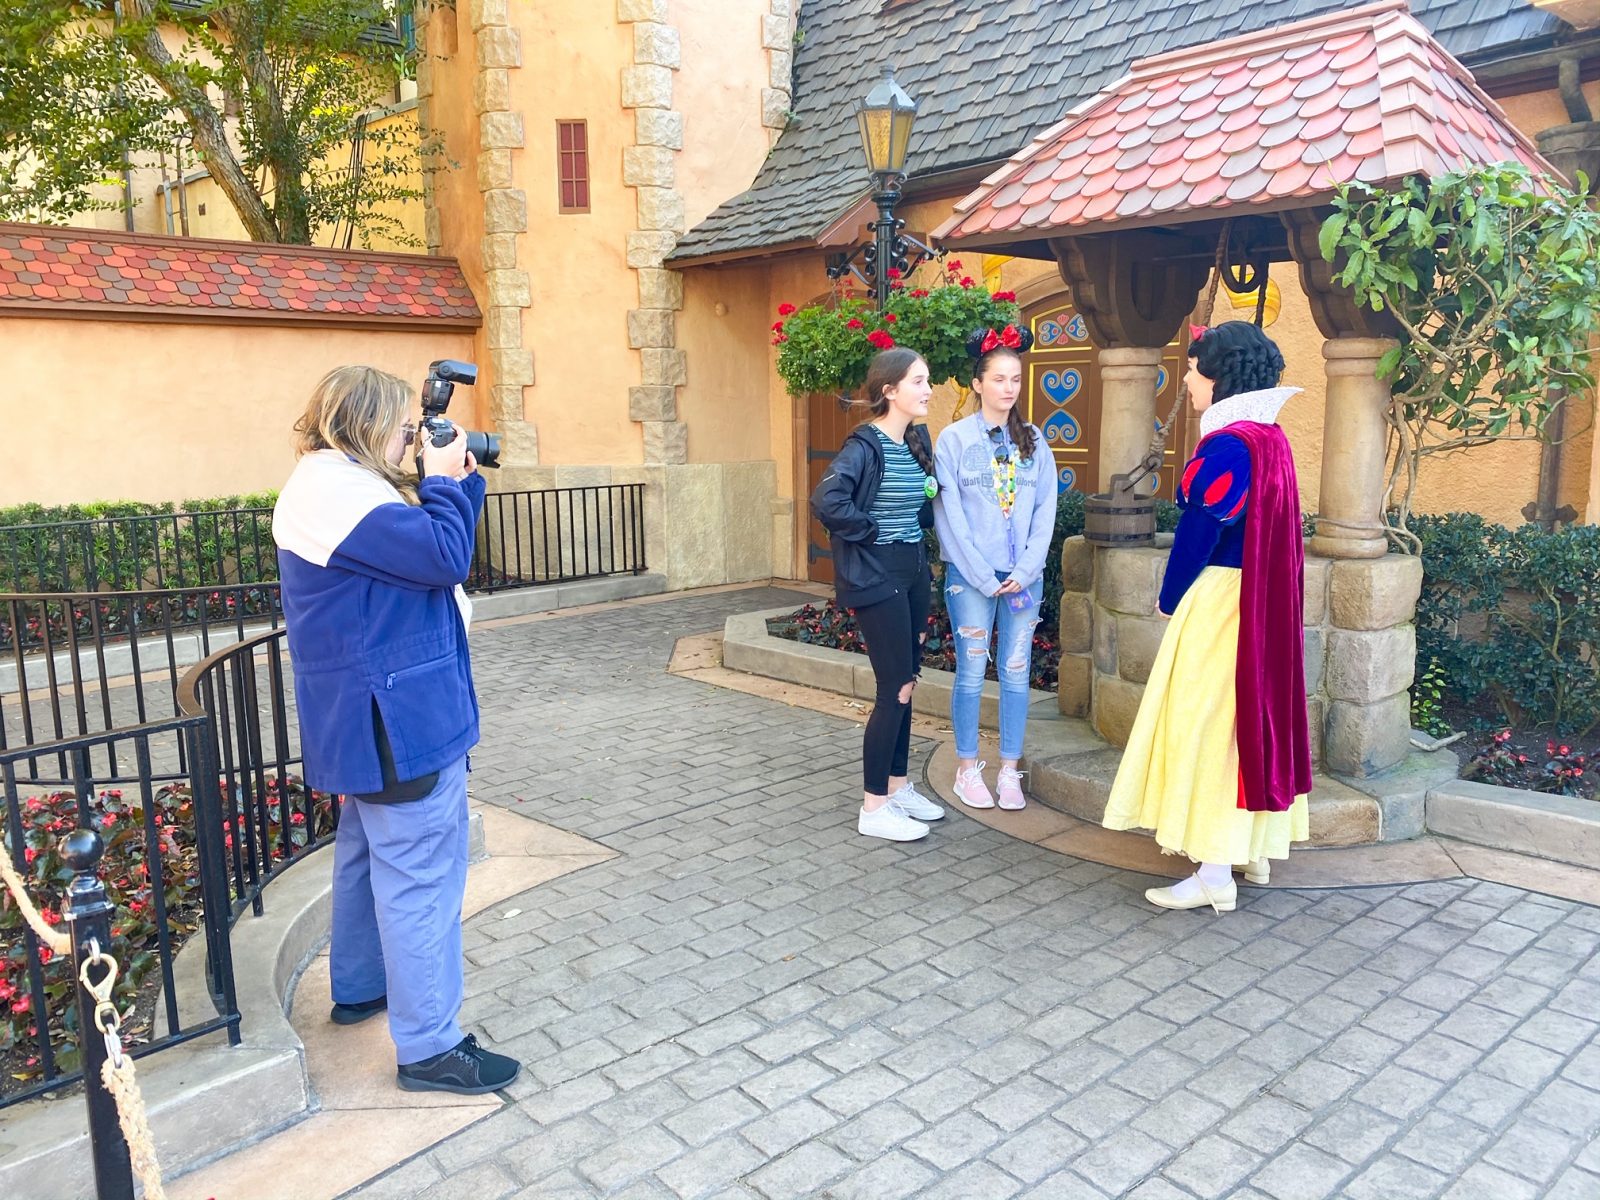
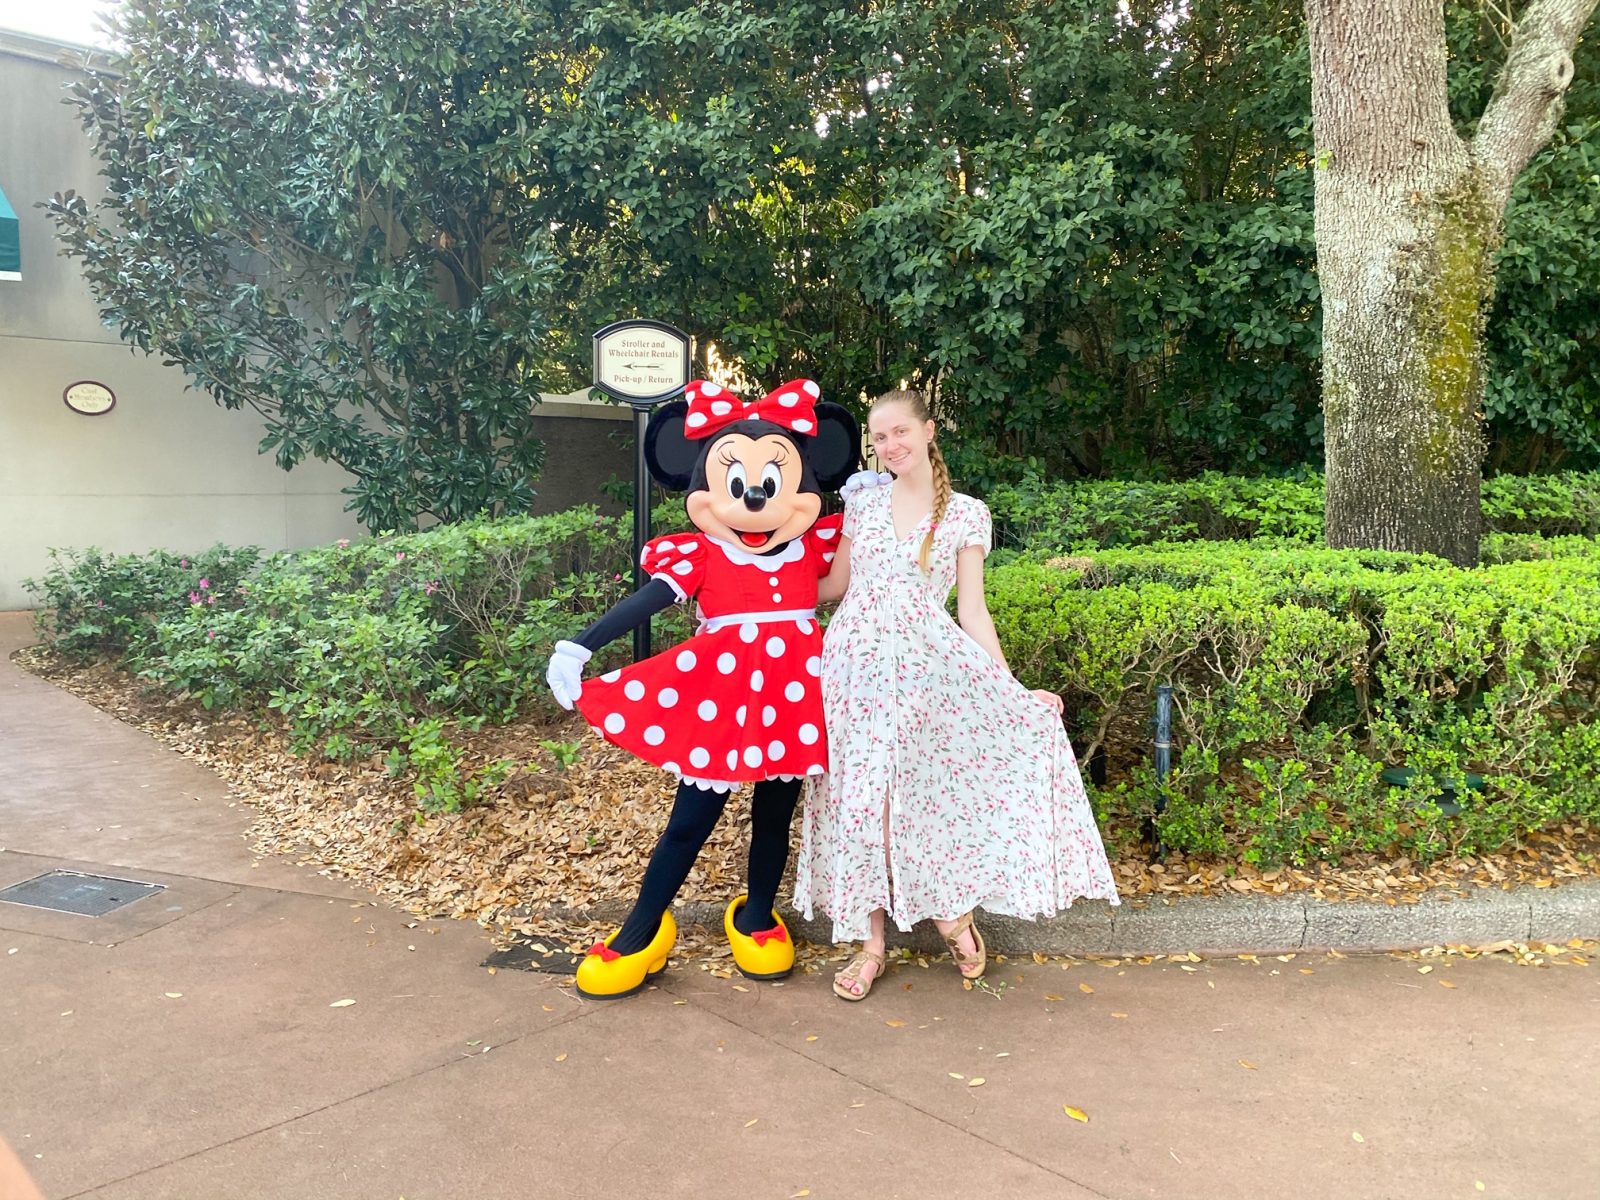
Before we dive into how Disney Memory Maker works, let’s talk about PhotoPass. Disney’s PhotoPass service employs professional photographers and places them around the parks, as well as some hotels and at Disney Springs. Using PhotoPass is totally free, so if you would love a photo, just hop in line!
These photographers take fun and professional photos of you and your family. They are trained to make sure to get everyone in the shot, and can capture some of the highlights of your trip because they are so well spread out– and featured at some of the most photogenic locations, of course! Can anyone say “Mickey!” and smile in front of Cinderella’s castle, for example?
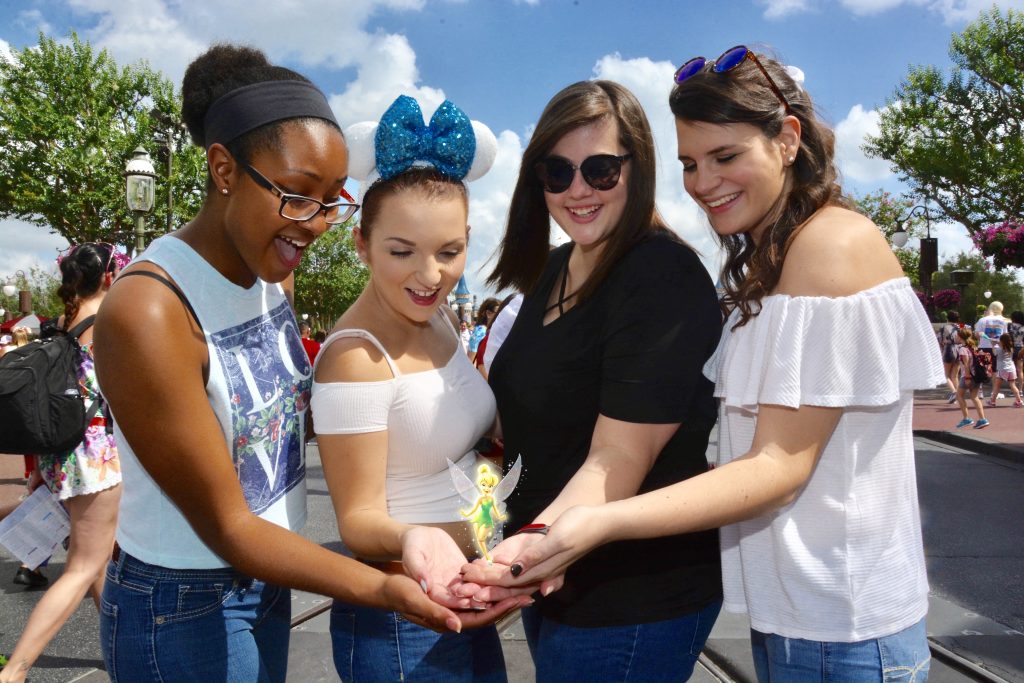
We should also make sure you know that PhotoPass covers your ride photos too! And better yet, PhotoPass has the cute option of photoshopping our favorite characters into the photo! Want to add Baby Yoda next to you while you pose in front of the Millennium Falcon? Not an issue!
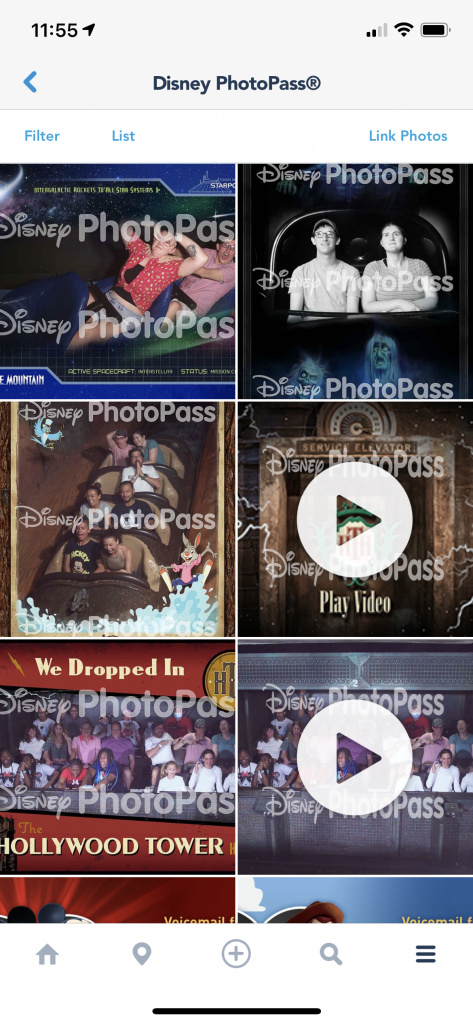
Disney Memory Maker, on the other hand, is a digital product that allows you to download and keep all the PhotoPass photos you have taken on your trip. Instead of paying for each photo individually, like you would through a PhotoPass, your purchase of Memory Maker lets you take unlimited photos and keep them all. For a photo hoarder like me, this may be music to your ears! The best part? Your Disney Memory Maker can include all of your photos taken, whether this be from a single day trip, or the entire length of your visit!
Once you purchase Disney Memory Maker, you link it to your MagicBand, park ticket, and Annual Pass. It links through the My Disney Experience app or the My Disney PhotoPass website. If you don’t plan on using a MagicBand or don’t have an Annual Pass, the PhotoPass photographer will give you a card that can then be linked in order to download your photos.
If you are doing a runDisney event you can also link your bib number in order to receive your race photos. Once you buy Memory Maker, you can assign it to someone in your group who has a My Disney Experience profile, and then you can link to everyone! This way everyone has access to all the photos taken on your vacation.
Once you are home from your trip, you can download all your photos from Disney Memory Maker or just your favorites, and share them with friends and family. On the Disney PhotoPass site you can even buy personalized items with your favorite memories on them, or even a USB flash drive to save them all in a safe place.
What Does Disney Memory Maker Cost?
If you purchase Memory Maker once you are on your vacation and in the park it will cost you more than if you purchase it in advance! Prices change (usually up!) so make sure to check the Disney website for updated information for Memory Maker when planning your trip!
Whether you buy it prior to you trip or once you are there, Disney Memory Maker gives you unlimited downloads and access to all the photos on your trip. For context, if you want to consider an idea of price, if you were to purchase a set of two 4×6 prints through a PhotoPass, you would pay $18.95 for these TWO photos. A bit pricey, if you ask me, especially if you want a lot of photos. With the Memory Maker, prices break down as below:
- Disney Memory Maker One Day- $69. This includes all of your photos and videos from one day of your choosing.
- Disney Memory Maker Advance Purchase- $169. This includes all of your photos and videos from your ENTIRE vacation. You must wait at least three days after purchase to activate.
- Disney Memory Maker- $199. This includes all of your photos and videos from your ENTIRE vacation and CAN be used upon purchase. No delay in activation required.
Please note that you can purchase Disney Memory Maker in the My Disney Experience App. Your photos will expire 45 days after the date they’re taken, and once they expire, you can no longer purchase or download them. However, if you need more time before your looming expiration date, you can pay to extend access to the photos for an additional 15 days. And an additional $19.95.
A note for Annual Passholders or those considering getting one: having a Disney Platinum Plus Annual Pass or Platinum Annual Pass allows you unlimited downloads of all your PhotoPass photos. This means you are basically getting Disney Memory Maker FOR FREE – they just don’t word it that way.
Overall, if you aren’t going to be in Disney World very long, or aren’t really into taking a lot of photos, you can do the Memory Maker One Day. It costs less and gives you a full day to take advantage of the PhotoPass photographers and get those unlimited downloads for that 24 hours. You will receive Memory Maker from 6 am the day you choose until 5:59 am the following morning. But if you want all of your photos and videos from you entire trip, make sure to either purchase early to save some money, or consider getting Disney Memory Maker the day of if this will be a fairly last minute decision!
Upsides to Disney Memory Maker and PhotoPass
There are a lot of perks for using Disney Memory Maker on your next trip, and these upsides can definitely make up for the pricey cost of it. Here are some of our favorites:
- You can get everyone in the photo! Mom doesn’t have to hold the camera like usual, and you’ll have photo evidence that everyone was there and having a good time.
- You get professional photos in your favorite parks, with your favorite characters, and on some of the best rides.
- Unlimited, let’s say that again, unlimited photos.
- These photos don’t take up storage space on your phone or cloud, and you don’t have to try and carry around a nice camera in the parks.
- PhotoPass photographers will help you with posing and give great directions, as well as their job is literally to make you look good in your vacation photos.
- Also, PhotoPass photographers sometimes have fun props and they have Magic Shots that will insert characters and some extra Pixie Dust into your photos.
- You own all your photos with no extra cost.
- The locations where photographers are stationed are typically captivating and fun.
- PhotoPass photographers are very accommodating, and will take photos with your phone as well.
- Pro tip! They are often in the parks prior to park opening, so if you have an early breakfast reservation take advantage of the near empty parks to get some great shots!

Downsides to Disney Memory Maker and PhotoPass
Even though there are a lot of perks to getting Disney Memory Maker, nothing is without its faults. There are some downsides to getting it as well:
- The cost! Disney is already expensive and another $200 could break the bank, even the $30 discount with advanced purchase doesn’t make it “cheap.”
- Can be overwhelming on a short trip.
- Not everyone in your group may be as excited as photos as you are.
- PhotoPass may not be available for a specific area or character you would like.
- It’s possible that your photos could get lost, so you have to stay on top of the photos – using the app is great for this, and if you notice some missing you can submit a missing photo report within 30 days of the date of the photos.
- Quality of photos can vary from photographer to photographer.
- It can take time to stop and get in PhotoPass lines, and take the photos. This may take up too much time in a busy day!
How to Pre-Purchase Memory Maker at Disney
If you’ve decided Disney Memory Maker is for you, then we suggest pre-purchasing it prior to your arrival in Disney World. Not only will you save money on the purchase, but it will guarantee you get all of your photos.
If you wait until your arrival or until you are actually in the parks, any photos you take within three days of the purchase won’t count toward your Memory Maker – unless you want to pay an extra $20. Our tip would be to buy it 4-5 days prior to your arrival just to be sure you don’t miss out on any of the photos and that you get the most use of your purchase.

How to Share Memory Maker Photos with Others
Once you purchase Disney Memory Maker, you have a lot of options for sharing these photos with friends and family. The easiest way is to make share photos is to link everyone to one My Disney Experience account. This means that this person is the one who bought Disney Memory Maker as well. By doing this, everyone on the trip can see each others photos and they are all linked to one Disney Memory Maker.
Another way to share them with friends and family is to add them as friends on your My Disney Experience app. These don’t have to be people you went on your trip with, but others that also have the MDE app and accounts. If you go under the “Friends & Family” page, you are able to share with them by checking the “My Disney PhotoPass Photos” box. If they click this as well you can view each others trip photos! How quick and easy! And if you need help with MDE, check out our article on The Ultimate Guide to My Disney Experience!
Once you get home from your trip, you have 45 days to download your photos and use them however you would like. After you download them, you own them! Which means after downloading you are free to edit, make copies, and order prints or products with your favorite photos on them.
If you do decide to buy the physical photos from the Disney PhotoPass site, you will receive a discount on each print. Pro Tip! Since you own these photos now, you would be better off heading to your local Walgreens and printing your photos for a cheaper price!
Also, another note for Annual Passholders: You have a year from each photo you get taken by a PhotoPass photographer to download it before it disappears! You have a lot more time than the 45 days with a purchased Disney Memory Maker! So maybe this will help you consider if you want to purchase an annual pass too!

Rides that Offer PhotoPass Photos
As well as taking fun photos in the parks and with characters, having Disney Memory Maker allows you to get epic ride photos. Just a note: most of these rides do require you to have a MagicBand in order to receive these photos. Consider getting one even if you aren’t staying on property or hadn’t wanted one! You can read more about some of these rides by checking out our list of the best Disney thrill rides, as well as our list of the best (and worst) Disney world rides!
- EPCOT: Test Track, Frozen Ever After
- Animal Kingdom: Expedition Everest, Dinosaur!
- Hollywood Studios: Tower of Terror, Slinky Dog Dash, Rock’n’Roller Coaster
- Magic Kingdom: Seven Dwarfs Mine Train, Space Mountain, Buzz Lightyear’s Space Ranger Spin, Haunted Mansion, Pirates of the Caribbean

Rides that Offer PhotoPass Videos
Right now there are only two rides in Disney World that offer on-ride Disney Memory Maker videos:
- Tower of Terror in Hollywood Studios
- Seven Dwarfs Mine Train in Magic Kingdom.
Disney Dining with PhotoPass Photographers
There are several dining locations within Disney World that offer the use of PhotoPass photographers as well. Just a note here, all of the restaurants that offer this are either character meals or dinner shows. Therefore, sometimes the availability of the photographers does change without notice!
The ones listed here are the ones that most consistently have PhotoPass photographers available. You can find our best tips for character breakfast and recommendations here!
- Akershus Royal Banquet Hall in Norway Pavilion in EPCOT – Princess Storybook Dining, available for breakfast, lunch, and dinner
- Be Our Guest in Magic Kingdom – Dinner ONLY when the Beast is available
- Cinderella’s Roya Table in Magic Kingdom – breakfast, lunch, and dinner
- 1900 Park Fare at Disney’s Grand Floridian Resort & Spa – breakfast and dinner
- Chef Mickey’s at Disney’s Contemporary Resort – breakfast, brunch, and dinner
- ‘Ohana at Disney’s Polynesian Village Resort – breakfast and dinner
- Disney’s Spirit of Aloha Dinner Show at Disney’s Polynesian Village Resort – dinner, obviously
- Hoop-Dee-Doo Musical Revue at Disney’s Fort Wilderness Resort – dinner

Other Ways to Use Disney PhotoPass
Even though we’ve already told you plenty of ways to get the most out of Disney Memory Maker, there are even more! We want to be sure that if you decide to purchase Disney Memory Maker that you are going to get the most bang for your buck. Here’s a list of some other great uses for Disney PhotoPass and Memory Maker:
- There are 3 PhotoPass Studios on property that allow you to walk right up and take free photos. There’s one in the Marketplace in Disney Springs, one in Sir Mickey’s in the Magic Kingdom, and one on the second floor of the Grand Floridian. All of these are conveniently located near or connected to Bibbidi Bobbidi Boutiques. Which leads us to…
- Bibbidi Bobbidi Boutique will take tons of photos of your kiddos during their services!
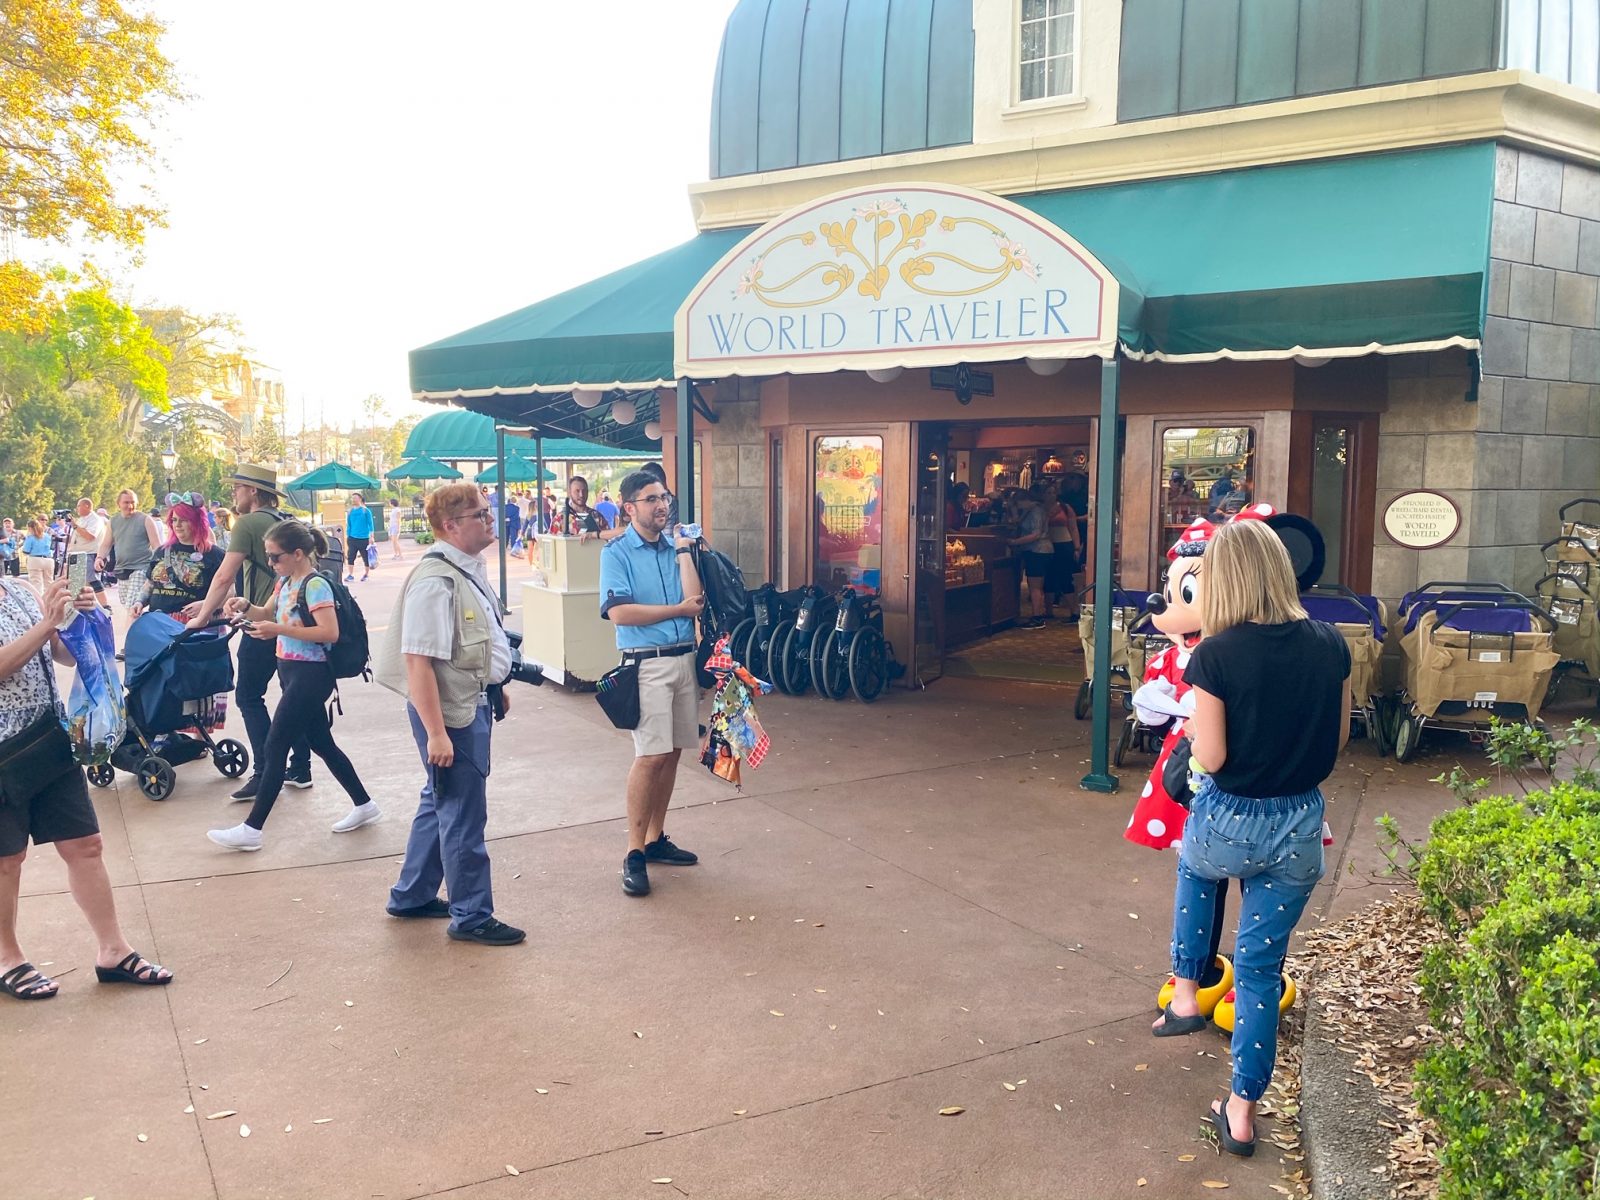
- Some character meet-and-greets have live photographers and some have the new PhotoPass boxes
- Enchanted Tales with Belle in the Magic Kingdom does take photos of those that volunteer and participate
- NBA Experience in Disney Springs has the stationery PhotoPass boxes
- Hard ticket and After Hours events often have special meet-and-greets or photo ops that are included in Disney Memory Maker
- Use PhotoPass photographers to take photos commemorating special events happening during your trip: family reunions, anniversaries, birthdays, honeymoons, first time trips
- Some Deluxe Resorts offer PhotoPass photographers during the Holiday season to take cute, Holiday-inspired photos in front of their trees and displays
- Disney now offers the Capture the Moment service which allows you to book a 20 minute private session with a PhotoPass photographer to take stylized photos. This costs $50 per session, and you can book two back-to-back for $100 if you really want something special (think engagement or baby announcements!). These photos are only included as free downloads for those who bought Memory Maker or are Annual Passholders.

How to Download Memory Maker Photos
Once you have taken your Disney Memory Maker photos, you can view them using the My Disney Experience app or the Disney PhotoPass website. It’s very easy to use the MDE app, and that’s probably the quickest and easiest way to download your favorite photos.
Either way, you select the photos you want and they begin downloading to your device automatically. You have the option of waiting until you get home, or you can download them right away while still in the parks.
Pro Tip! If you didn’t pre-purchase Disney Memory Maker prior to your trip, don’t forget to link it to your account using either your MagicBand or any cards you may have you used during your trip. Make sure everything is linked before you start downloading to make sure you don’t miss out on any photos!

Is Memory Maker Worth It?
In a word, yes! But the longer answer is maybe. It may not be right for everyone and for every trip to Disney World. If you decide to purchase it, make sure you get your money’s worth out of it. It may only be worth the cost for your family if you are:
- planning to take a lot of photos during your stay
- staying for a longer time, at least 4 days or more
- celebrating something special
- going to do several character meals and/or meet-and-greets
- doing special hard ticket events like After Hours, Mickey’s Not So Scary Halloween Party, or Mickey’s Very Merry Christmas Party
- riding the rides that offer PhotoPass
- someone who enjoys having their photo taken, and your family enjoys it as well
We hope this article answered some questions you may have had about Disney Memory Maker and the PhotoPass service. While buying Memory Maker can be a costly purchase, it can allow you to get some great photos out of it. Using our tips will make sure you get your money’s worth from your Disney Memory Maker purchase and make sure you have the most fun while doing so!
Pin this post:

 David’s DVC Rental Review: Worth It Or Too Good To Be True?
If my photo pass is linked to all my friends and family, can they just scan their park ticket card to get photos taken or do they have to use my photo card each time. Didn’t know if the park ticket cards worked like a photo card and sends everyone’s photos to my memory maker linked to everyone. It would be difficult passing my photo card around all the time, esp if they can just scan their park ticket card
This is a good question and I am going to be honest, I don’t know the answer, but I am going to try and find out for you!! If you have Facebook, please repost this in my Disney Trippers facebook group! I am going to help find some answers otherwise!